In this tutorial you will learn how to
Beginner
If you are not interested in the explanation of data flow and control flow, you may skip the introduction and continue with Creating a New Project.
VRL provides two types of flow connections: data flow connections (see Figure Data Flow Connection)
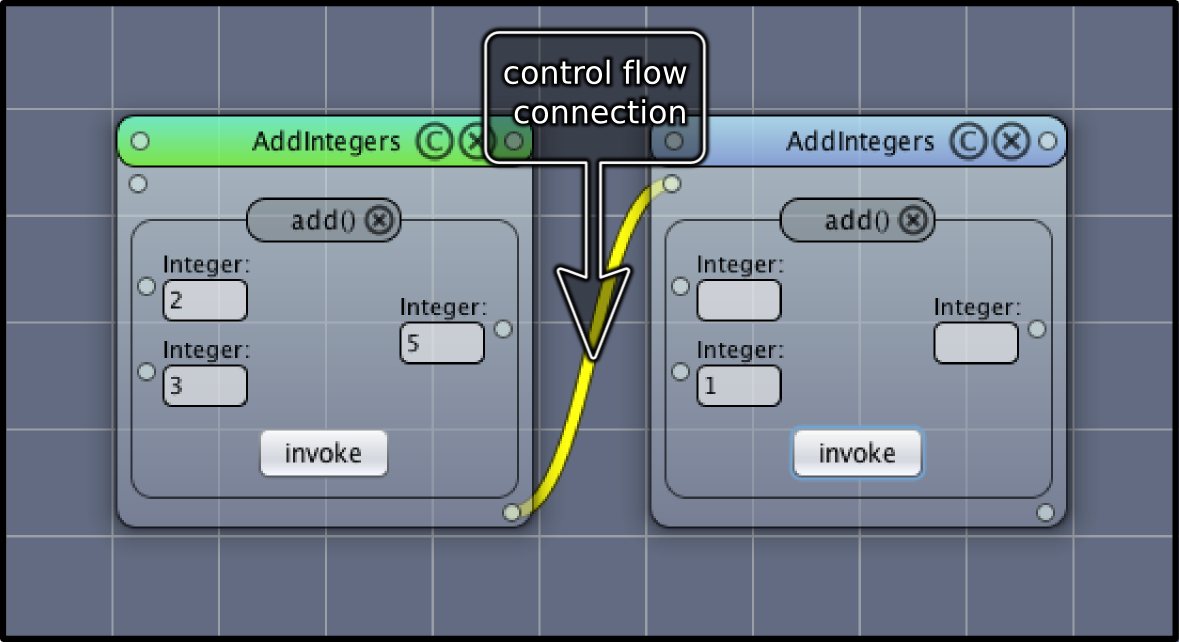
and control flow connections (see Figure Control Flow Connection).
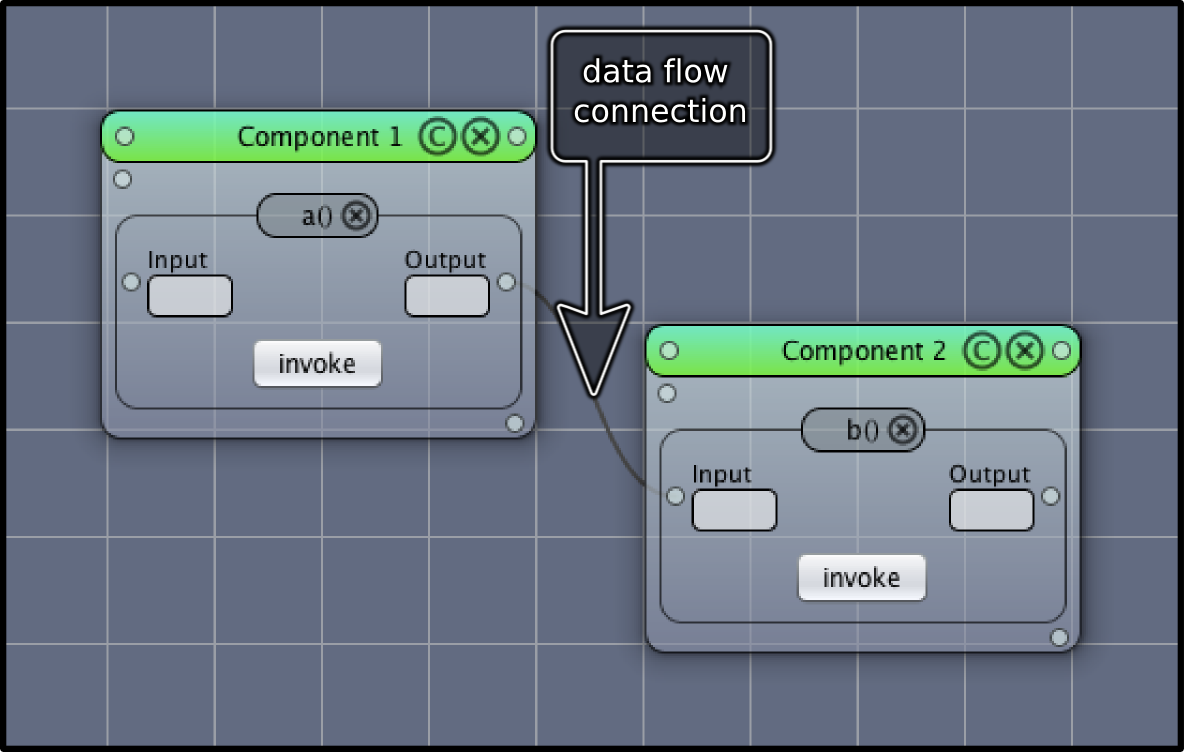
A data flow connection describes the data dependencies between methods. Figure Data Flow Connection shows two components. Each of them has one method. A control flow connection indicates a data dependency between the two methods. Method b() of component 2 depends on the result of method a() of component 1.
If you are not familiar with the term method think of it as a specific task that takes some input data and produces output data.
Name:   add
Input:  a, b
Taks:   c = a + b
Output: c
See Figure Data Dependencies of add() for two add() methods that are connected with a data flow connection. The result of the first add() method is necessary to invoke the second add() method.
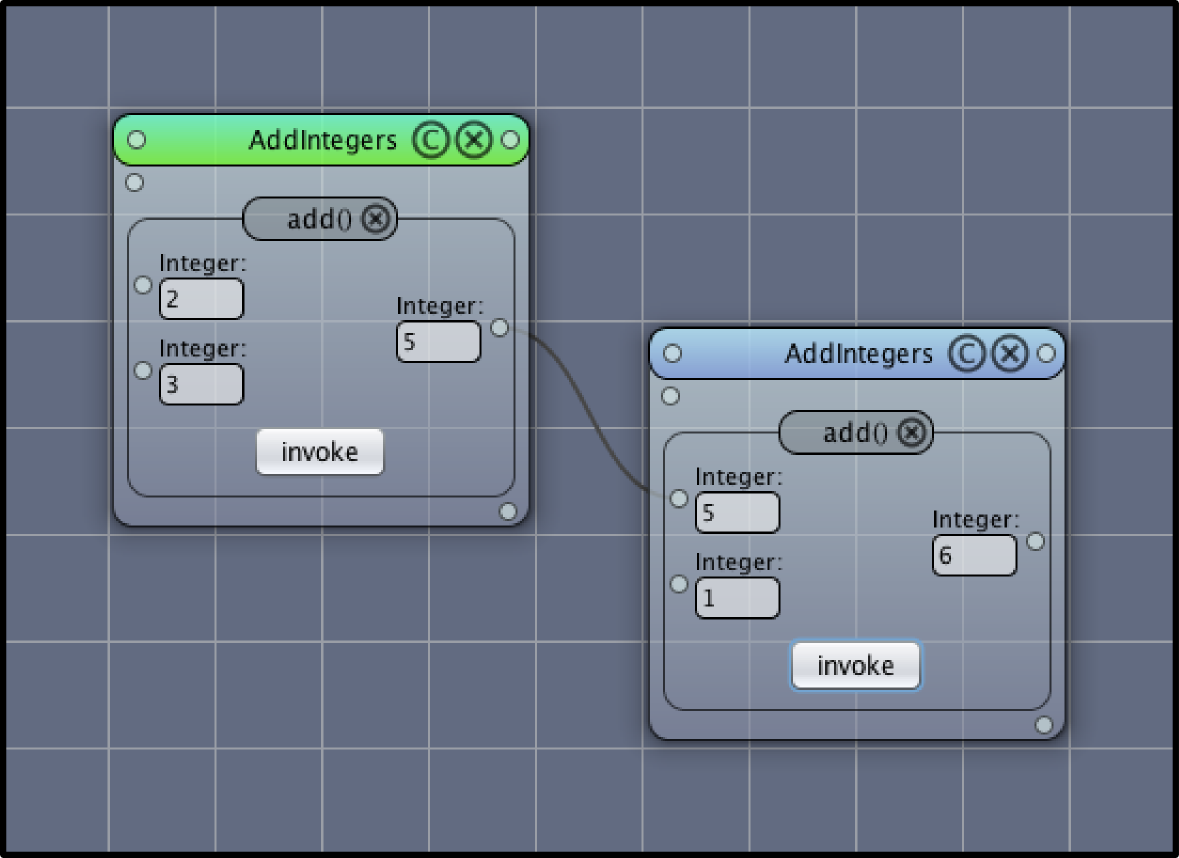
add()A control flow connection describes the invocation order of methods, i.e., the execution order of tasks.
Note: Invocation orders of methods can be defined explicitly via control flow connections or implicitly by defining data connections. In many cases however it is necessary to use both, data connections and control flow connections to define a workflow.
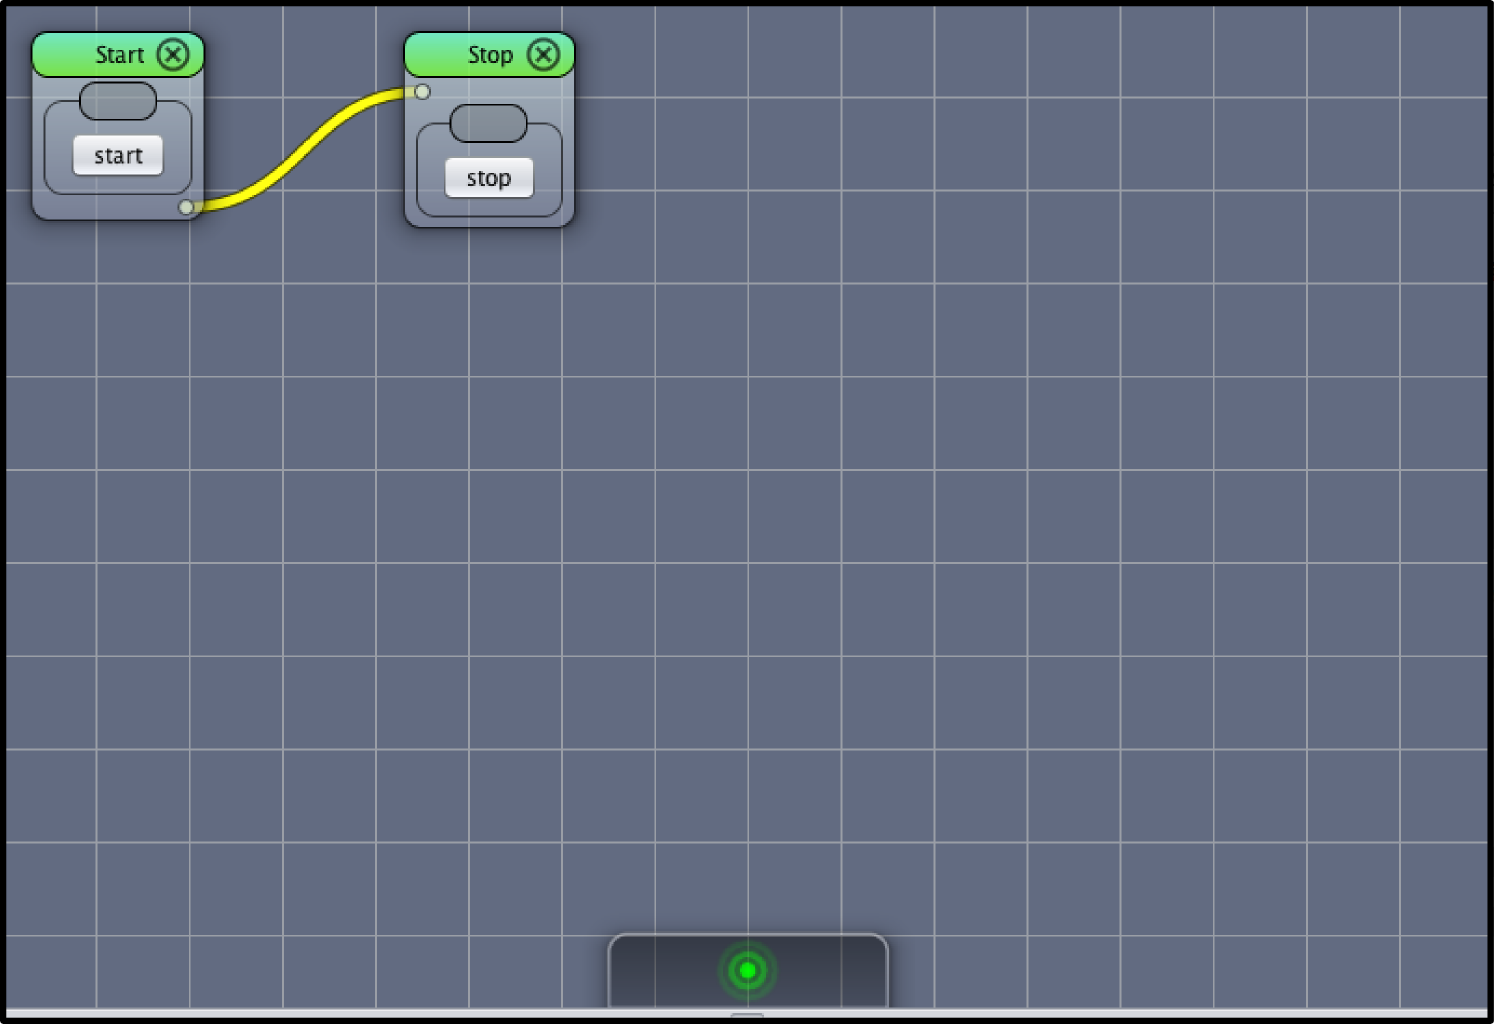
Cancel.File->New-ProjectThe displayed content should look like this:
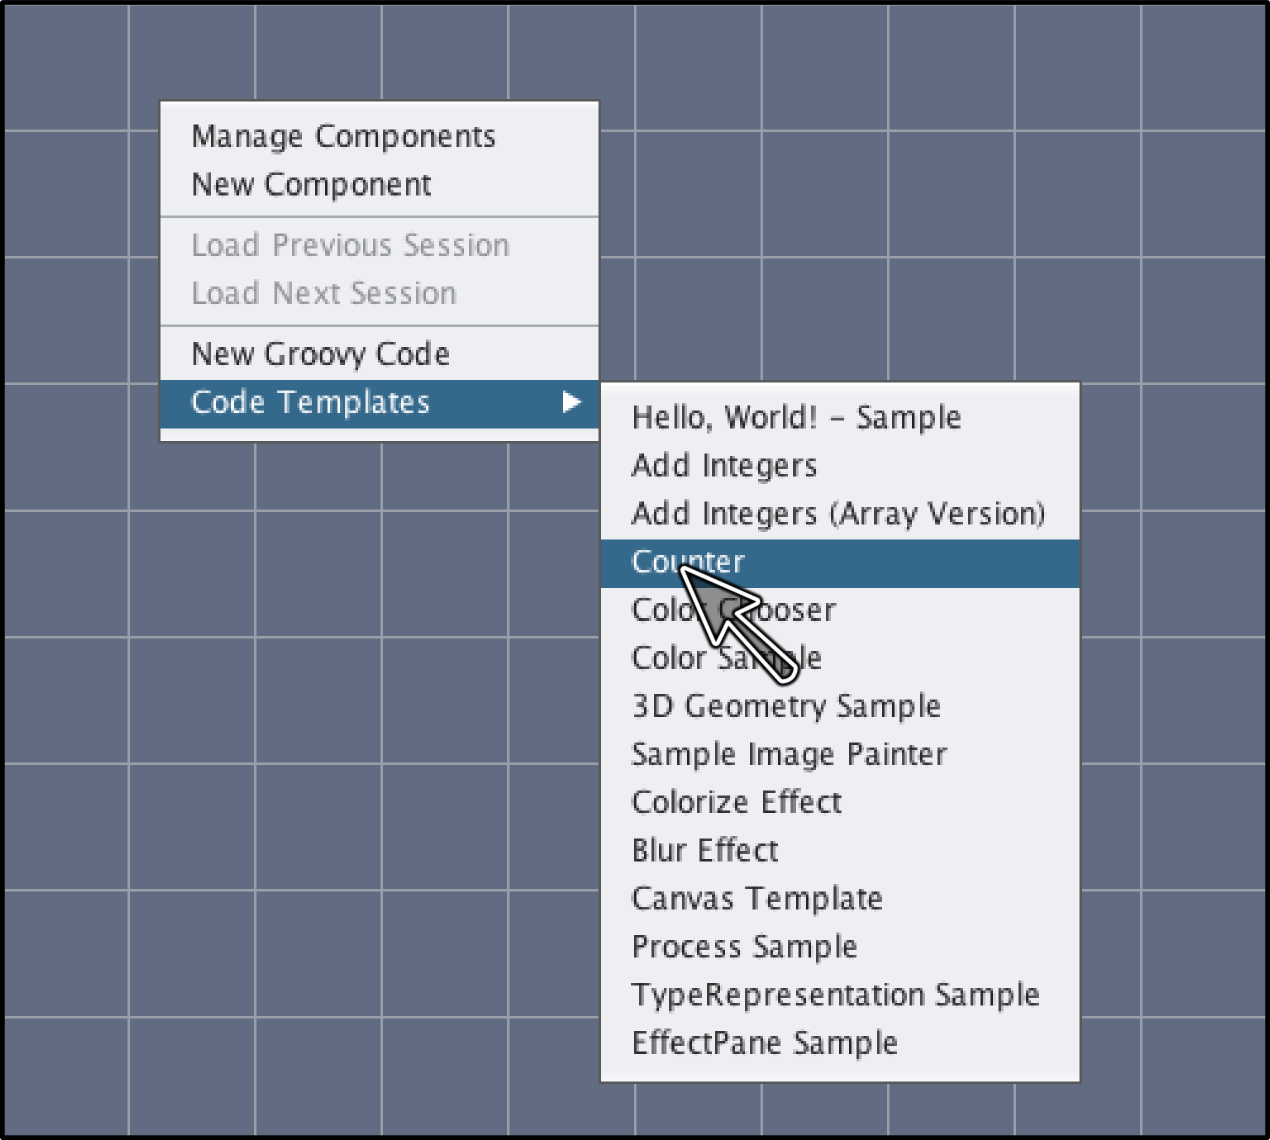
First, right click on the canvas and click on Code Templates->Counter (see Figure Code Templates)
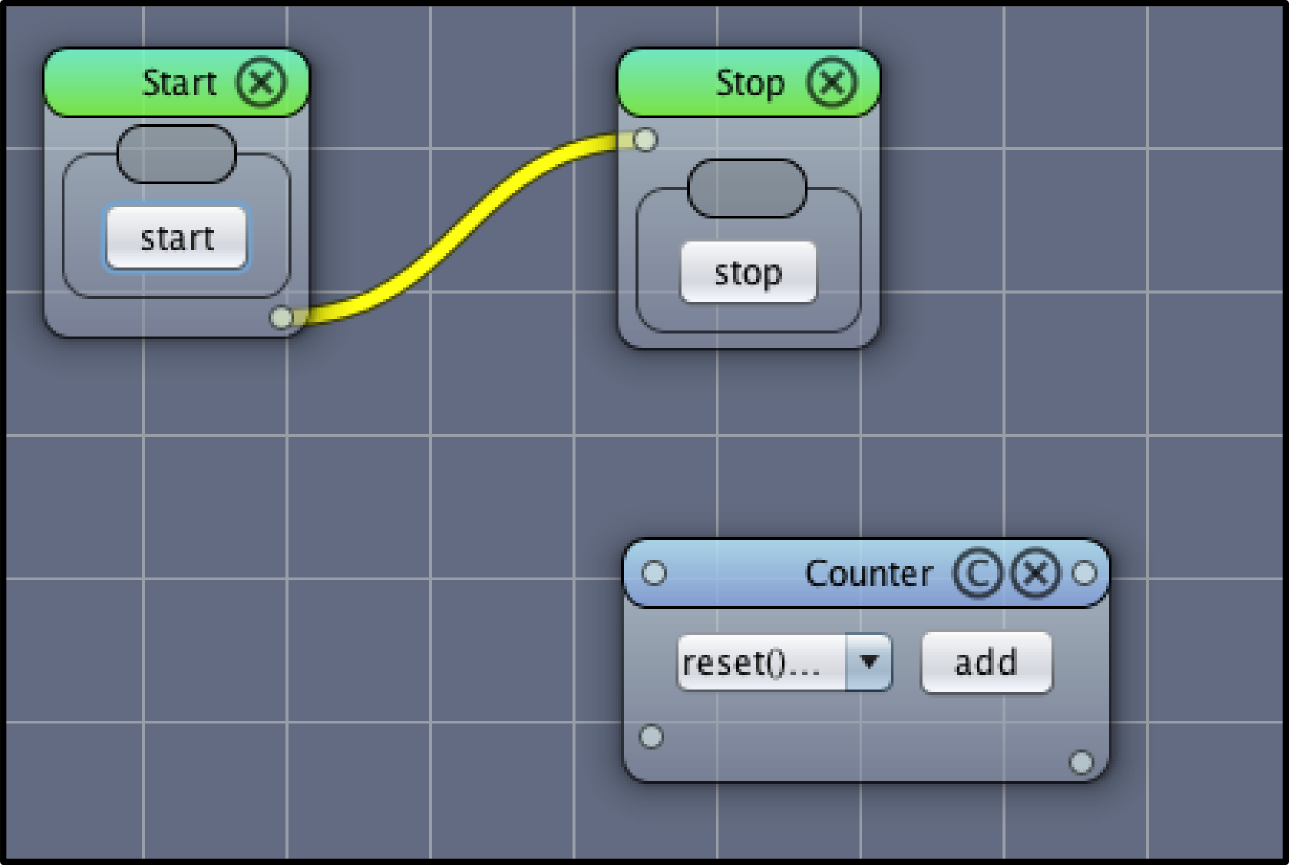
Compile the code by pressing on the Compile button. Now, open the Component Management window, add the Counter component to the canvas and close the code window. The desired result is shown in Figure Counter Component.
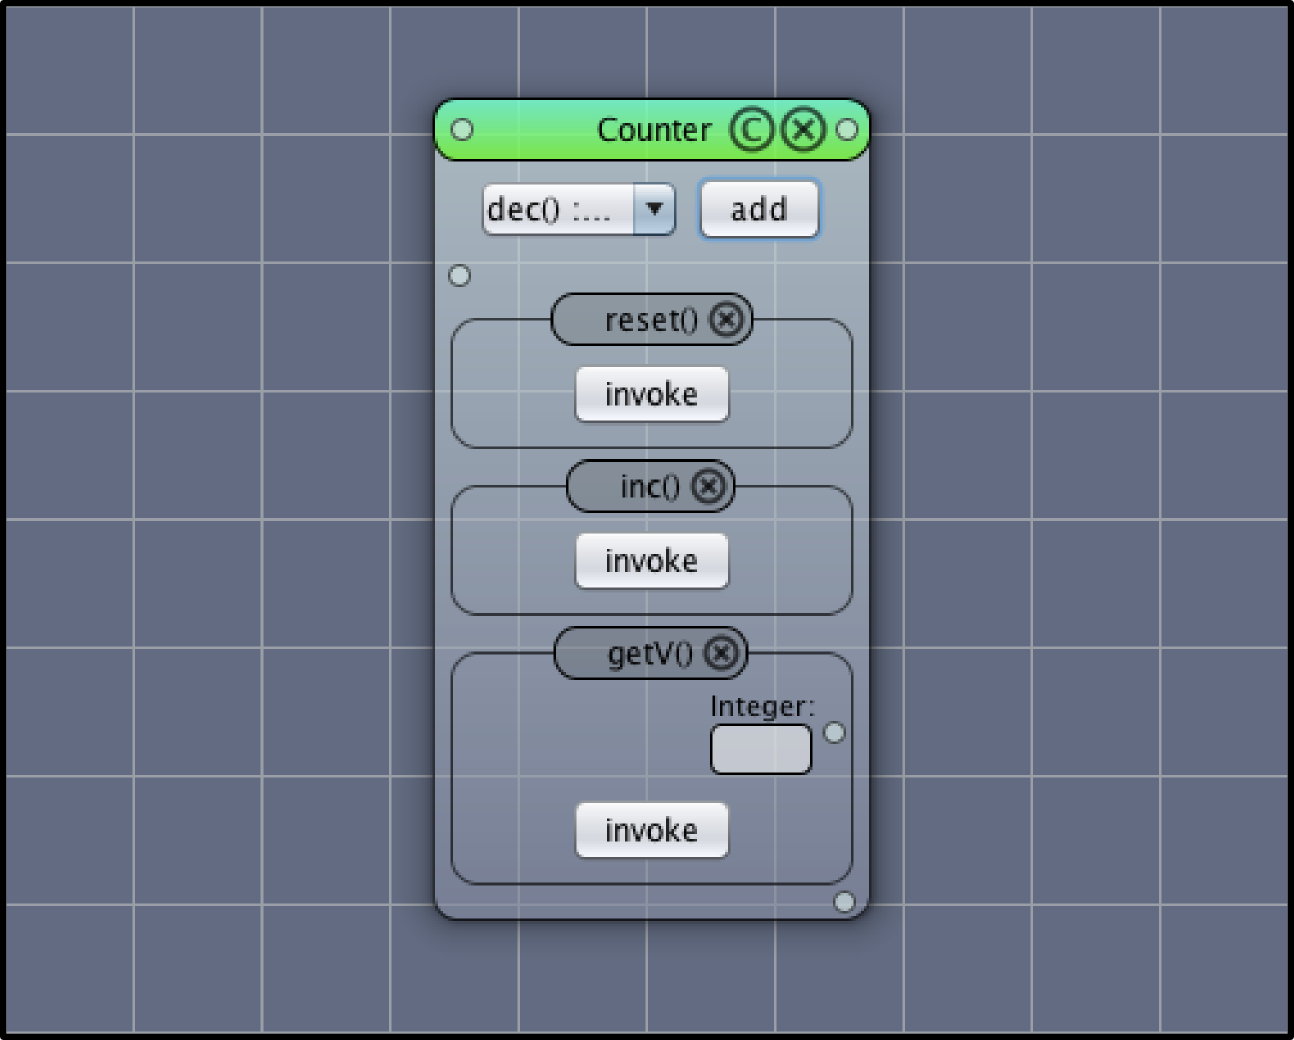
If a component class declares more than one method they are usually not shown in the component window. To add a method click on the drop down box, choose a method and click on the add button.
Add the following methods (the order matters!):
The desired result is shown in Figure Counter Methods.
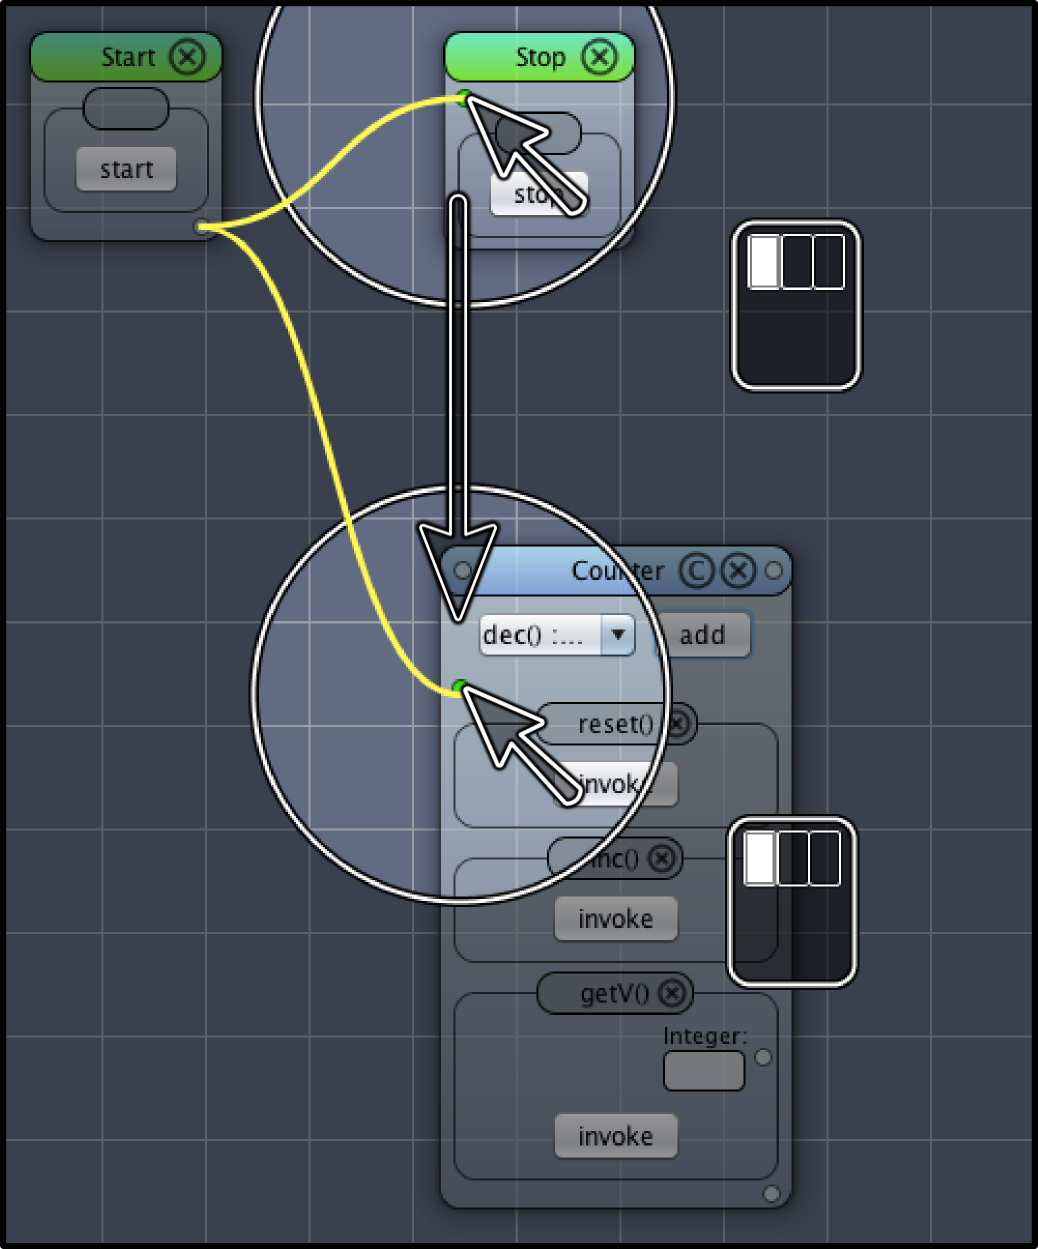
To add the Counter object to the control flow drag the end of the yellow connection from the Stop object to the control flow input of the the Counter object (see Figure Move Control Flow Connection).
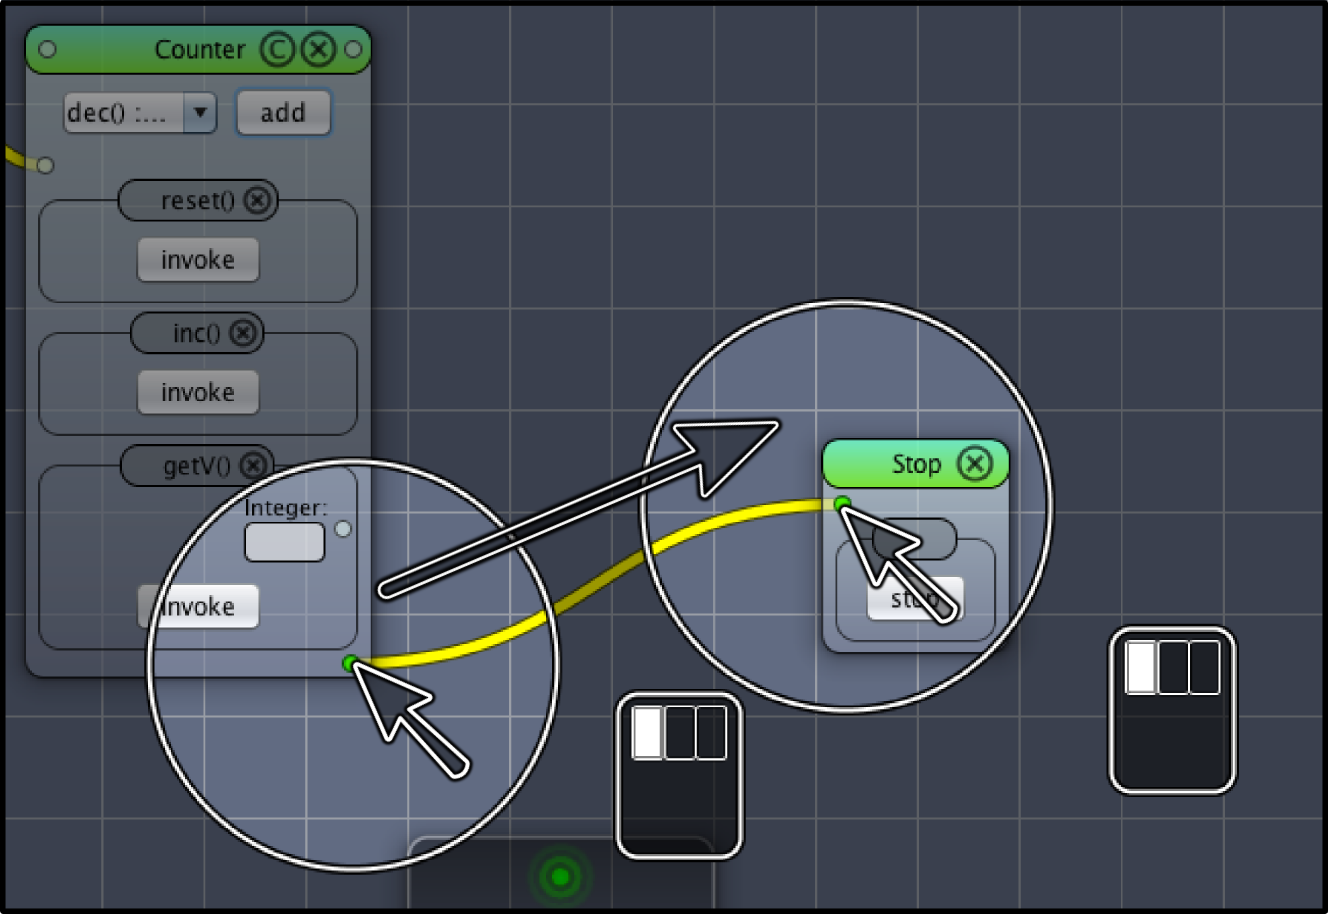
To complete the control flow drag a connection from the control flow output of the Counter object to the Stop object. To do so, first move the Stop object from the top to the bottom (see Figure ). Next, drag a connection from the control flow output of the Counter object to the Stop object (see Figure Create Control Flow Connection).
The control flow executes the following methods:
Counter counter = new Counter()
counter.reset()
counter.inc()
v1 = counter.getV()
Click on the Start button to execute the control flow. The method getV() will return 1 (v1 = 1).
To change the order of the methods of the Counter object you can drag them up and down. Drag the reset() method down below the inc() method (see Figure Change Method Order).
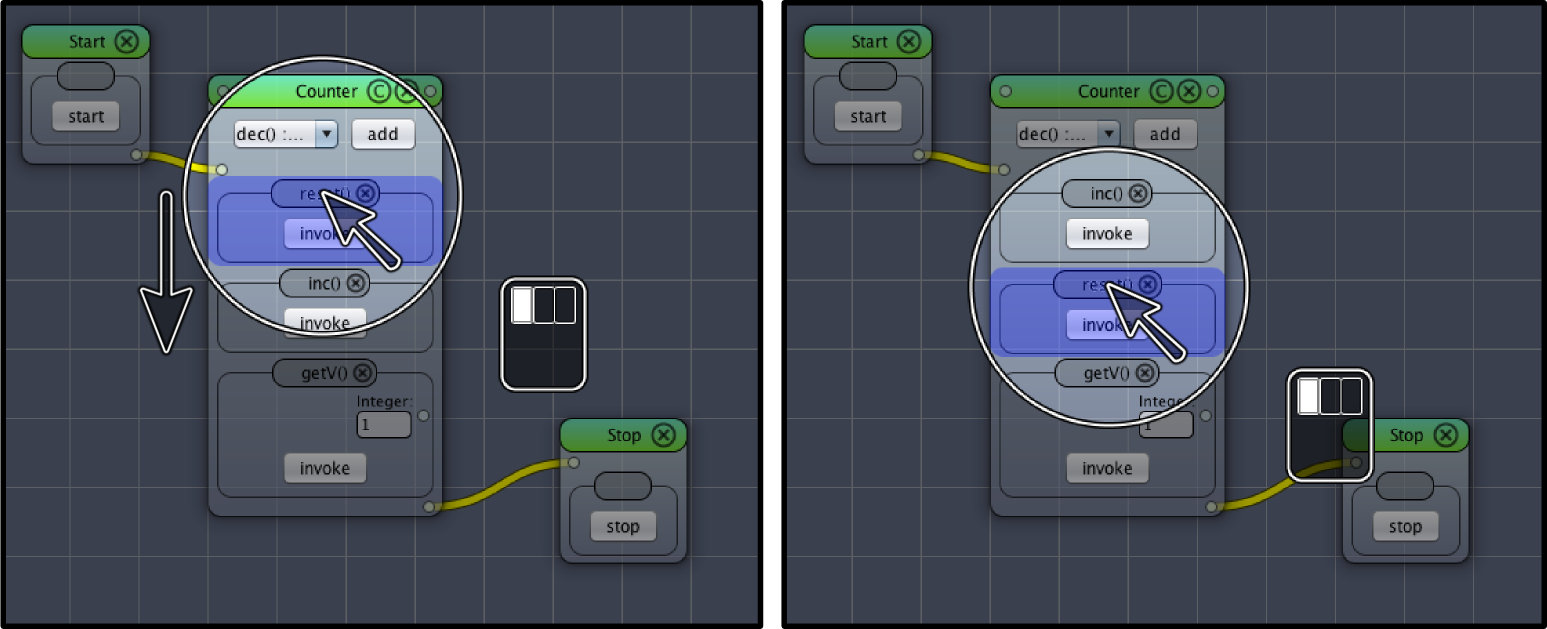
If you click the Start button again getV() returns 0. The Counter component should look as shown in Figure Changed Method Order.
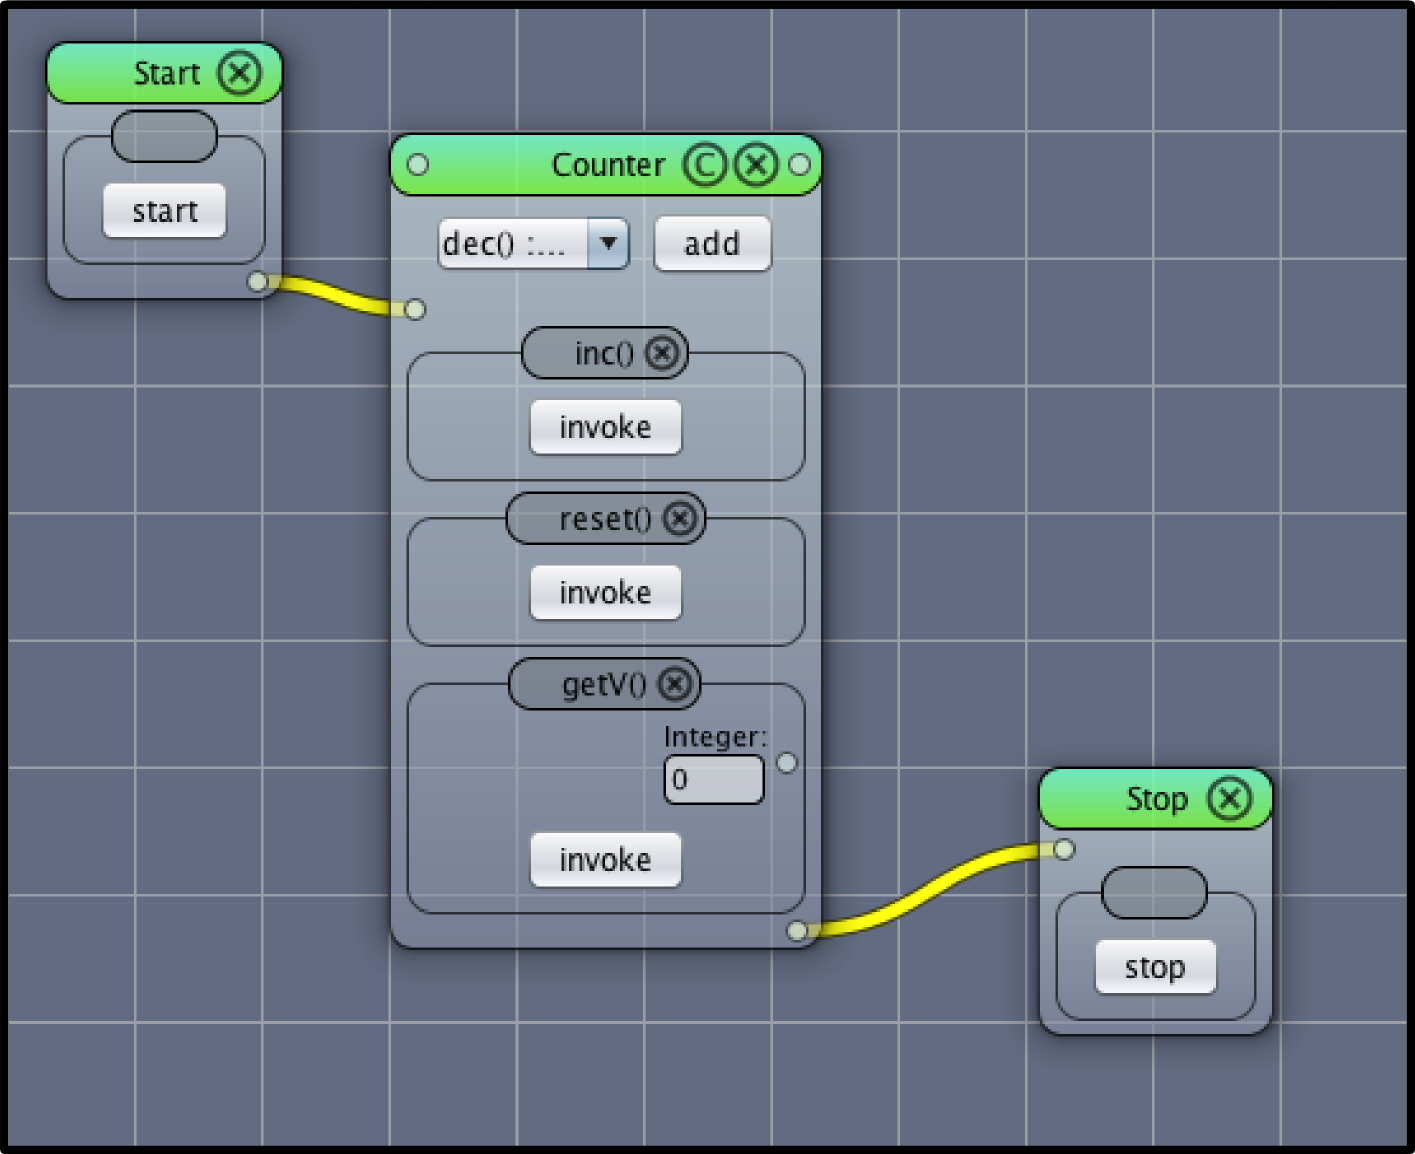
For the next steps you have to revert the method order by dragging the reset() method up. See Figure Counter Methods for the correct method order.
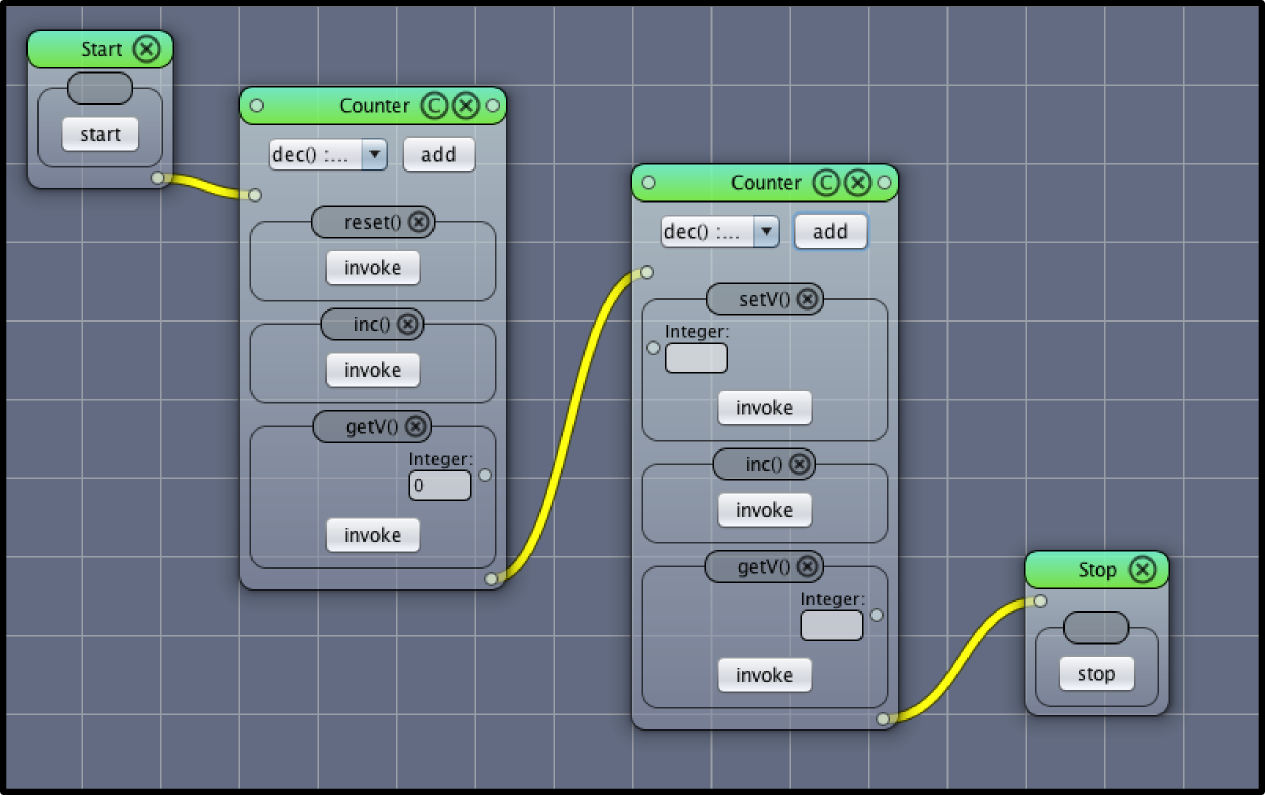
Now add a second Counter object to the canvas and add the following methods (the order matters!):
Add the object to the control flow. This is done exactly as before. Figure Two Counter objects shows the desired result.
Now drag a data connection from the output connector of getV() of the first Counter object to the input connector of the second Counter object (see Figure Create Data Flow Connection).
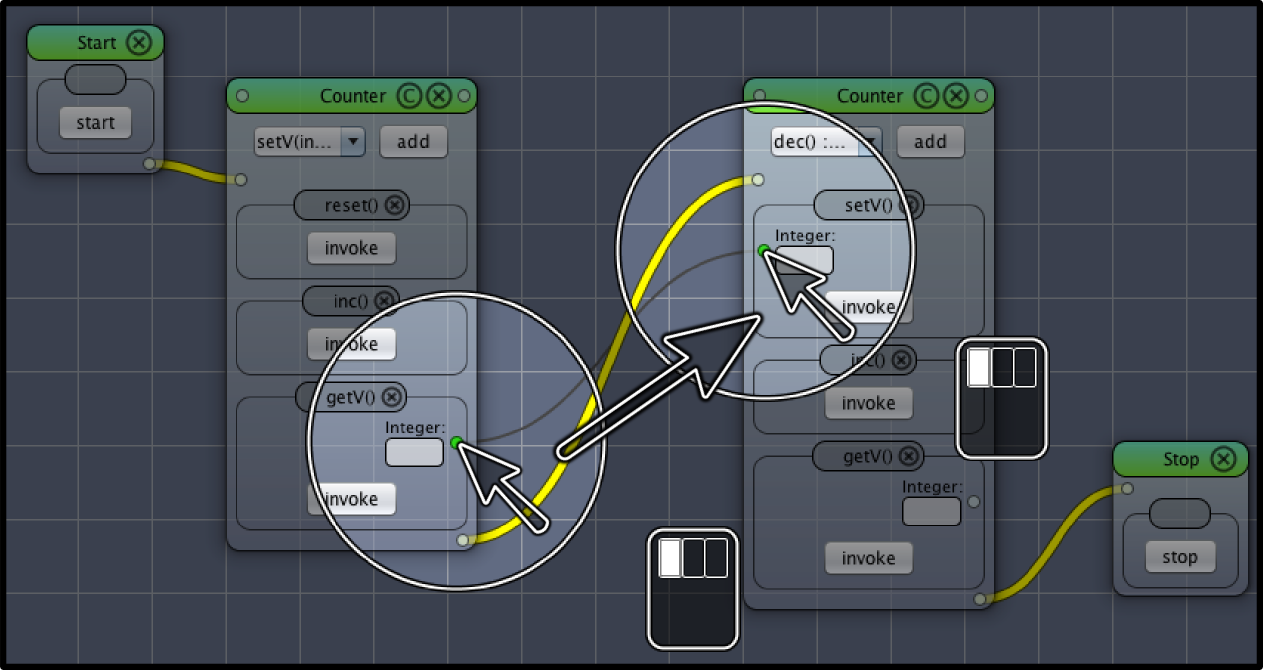
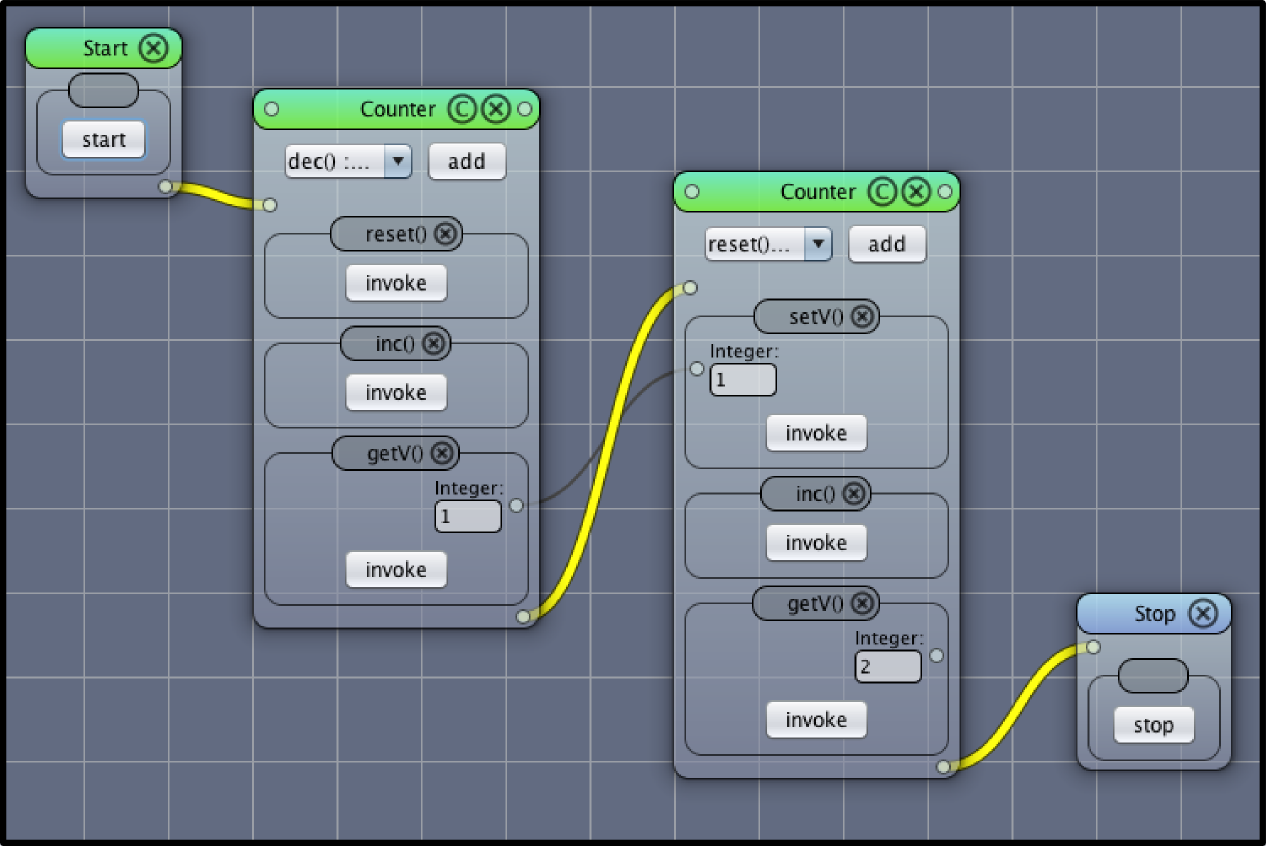
The final workflow executes the following methods:
Counter counter1 = new Counter()
counter1.reset()
counter1.inc()
v1 = counter1.getV()

Counter counter2 = new Counter()
counter2.setV(1)
counter2.inc()
v2 = counter2.getV()
After executing the workflow, the getV() method of the first Counter object returns 1 (v1 = 1). The getV() method of the second Counter object returns 2 (v2 = 2, see Figure Final Workflow).